
How to install Xen Orchestra community edition with certificates for https on ubuntu 20.04 for managing XCP-ng evironment step-by- step guide

The source for this information is https://github.com/Jarli01/xenorchestra_installer and the XCP-ng forum. Consult them it is a source of many solutions.

To start you could install the XCP-ng center version to create your vm for installing Xen Orchestra. Or use the trial version of XOA by going to the url of your XCP-ng host and using quick deploy. The third option is go to my previous article on how to install a Xen Orchestra CE from image by using the xe cli commands https://hometinylab.blogspot.com/2020/11/how-to-install-xen-orchestra-community.html

I think the simple route if you have a windows workstation is to use XCP-ng center windows.

In my case I am going to start from the third option. Using my virtual Pop!_OS workstation on XCP-ng.


Here we go:

Login into Pop!_OS.

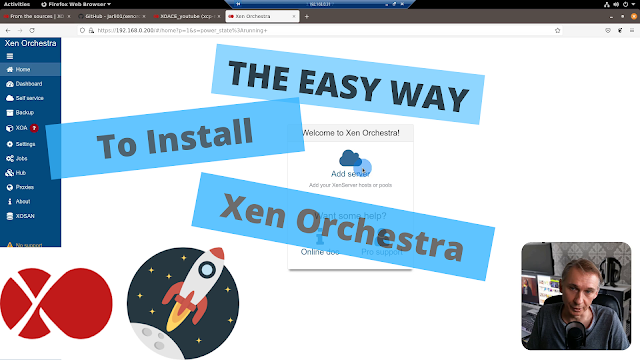
Opening a session to Xen orchestra (running in a vm on my TreuNAS CORE 12)

Cloning a fresh install of ubuntu 20.04

Renaming it to XOACE going to the VM config to assign more memory the minimum is 3 GiB so in static i will give it 4 GiB and in dynamic from 3 Gib to 4 Gib. All my memory is taken for now in this way. I will have to think about a way to upgrade my XCP-ng with a new system or with a little memory upgrade?

Starting up the VM

a nice tool is using terminator to make ssh session to the new XOACE server from my Pop!_OS

Changing the hostname because firstvm in the prompt is weared.

$ sudo vi /etc/hostname

change firstvm in my case to the new name

Setting the VM to fixed IP.

If you don not want to type sudo each time you could do sudo bash for a long term session.

$ sudo bash or continue with using sudo every time

with this done try ifconfig in my case I had to install net-tools

$ sudo apt update (update the library)

$ sudo apt upgrade -y 

$ sudo  apt install net-tools

$ sudo ifconfig

in my case only one interface eth0 is active ignore lo.

you could also look with Xen Orchestra by going to the network tab of the vm.

but take note of the interfaces name in my case eth0

go to folder /etc/netplan

$ cd /etc/netplan

op file 00-installer-config.yaml

$ sudo vi 00-installer-config.yaml

change the value for dhcp4 to no

dhcp4: no

adding after the dhcp4

addresses: [192.168.0.32/24]
gateway: 192.168.0.1
nameservers:
addresses: [192.168.0.12]

the file must look like this:
# This is the network config written by 'subiquity'
network:
  ethernets:
    eth0:
      dhcp4: no
      addresses: [192.168.0.32/24]
      gateway4: 192.168.0.1
      nameservers:
              addresses: [192.168.0.12]
  version: 2

execute

$ sudo netplan apply

and open a new session to the new ip address of the server 192.168.0.32 in my case

than execute to install XOACE

$ sudo curl https://raw.githubusercontent.com/Jarli01/xenorchestra_installer/master/xo_install.sh | sudo bash

let the process run

take note that the login is admin@admin.net password is admin don't forget to change your password

go to your web browser type in the ip of the newly configured system

if you are using this in your lab you can skip this section but for production please continue before using XOACE

generate a new key and self signed certs

$ sudo openssl req -x509 -nodes -days 3650 -newkey rsa:4096 -keyout /etc/ssl/private/key.pem -out /etc/ssl/certs/certificate.pem

 edit the following file 

$ sudo vi /opt/xen-orchestra/packages/xo-server/.xo-server.toml

change port 80 to 443 and add the following lines

cert = '/etc/ssl/certs/certificate.pem'

key = '/etc/ssl/private/key.pem'

Save your file.

Restart the service.

$ sudo systemctl restart xo-server.service

check if your vm is autopower on state and check memory values

to update the your version of XOACE use the following script

$ sudo curl https://raw.githubusercontent.com/Jarli01/xenorchestra_updater/master/xo-update.sh | sudo bash

you will have enter some credantials but be free the fill it in when needed


Comments

Popular posts from this blog

How to migrate a dataset from one pool to another in TrueNAS CORE ?

The migration steps. 1. Stopping the services that use the dataset. (recommended). 2. Replicating the dataset to the new pool. 3. Verify that all data is replicated. 4. Put in operation the new dataset. 5. Delete the old dataset when satisfied (or not).   The video tutorial can be found by clicking on the title or the picture below. How to migrate a dataset from one pool to another in TrueNAS CORE 1. Stopping the services that use the dataset (recommended). Go to the services tab and what I do if not certain of which services are used by the dataset I let only running the services from which I am cetain that they do not use the dataset. Also, control jails and Virtual Machines to be sure that they do not use the dataset. In the video I do not stop the services to show it is possible. 2. Replicate the dataset to the new pool. a. go to Tasks --> Replication Tasks b. add new replication task c. select source location (example select on this system source /mnt/volume1/VM iso) d. select

Using docker on FreeNas (TrueNAS Core)

In this tutorial we will go over the installation of docker in FreeNas (if using jails is not enough). The first step will be to install a host for docker in a virtual machine. In the documentation for FreeNas they propose to use Ubuntu. My actual version of FreeNAS is FreeNAS-11.3-U4.1.(now TrueNAS CORE 12). The video tutorial can be found here https://hometinylab.blogspot.com/2021/01/follow-up-on-using-docker-on-truenas.html  . The major job will be to install a virtual machine on the FreeNAS platform. Select Virtual Machines in the FreeNAS menu. In the list you will see the existing docker instance running. Know click on the ADD button and we will create a second one for this tutorial. Step 1 Because we are using Ubuntu 20.04 has guest operating system we will select linux . Know we need to name the machine, for this tutorial it will be dockerblog . It is always handy to use the description field docker on Ubuntu for blog tutorial . All what follows we will keep has is.  Click Next

How to fix a degraded pool state in TrueNAS ?

The title could also be``How to change a bad drive in TrueNAS?`` and in my case ``How to upgrade the pool storage space?`` but had it the end it was ``How to trouble shoot during this process?``.  The documentation I used can be found had  https://www.ixsystems.com/documentation/freenas/11.2/storage.html#replacing-a-failed-disk How to fix a degraded pool state in TrueNAS ? In my homelab environment I am using, one off the disks is bad in my TrueNAS. I had to detach the faulty drive to be able to boot the server up again. To replace the disk you must have a replacement disk from the same size or bigger. Because I have to upgrade my pool to a bigger capacity I will change all my 2TB drives to 6TB drives but for obvious reasons I will begin with the bad one: ``I like my data``. Before replacing the drive I will scrub the pool and set the faulty drive offline (which was not possible because the drive was not connected). Replace the drive and adding it again to the pool has a replacement. T