The migration steps.
1. Stopping the services that use the dataset. (recommended).
2. Replicating the dataset to the new pool.
3. Verify that all data is replicated.
4. Put in operation the new dataset.
5. Delete the old dataset when satisfied (or not).
2. Replicating the dataset to the new pool.
3. Verify that all data is replicated.
4. Put in operation the new dataset.
5. Delete the old dataset when satisfied (or not).
The video tutorial can be found by clicking on the title or the picture below.
How to migrate a dataset from one pool to another in TrueNAS CORE
1. Stopping the services that use the dataset (recommended).
Go to the services tab and what I do if not certain of which services are used by the dataset I let only running the services from which I am cetain that they do not use the dataset. Also, control jails and Virtual Machines to be sure that they do not use the dataset. In the video I do not stop the services to show it is possible.
2. Replicate the dataset to the new pool.
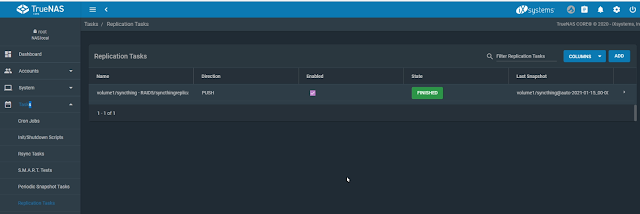
a. go to Tasks --> Replication Tasks
b. add new replication task
c. select source location (example select on this system source /mnt/volume1/VM iso)
d. select destination location (example select on this system destination /mnt/RAID5/VM iso) it will create the dataset with the name that you give for dataset in the destination.
e. leave all other values to there default
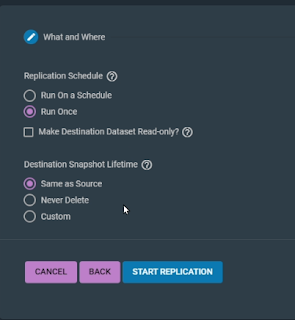
f. click on next following screen will appear
g. for replication schedule select Run Once and uncheck the box from Make Destination Dataset Read-only. Click on Start Replication
h. click on close to close the pop-up message
i. check the state it should be RUNNING and you can check the progress in the Task Manager 3. Verify that all data is replicated.
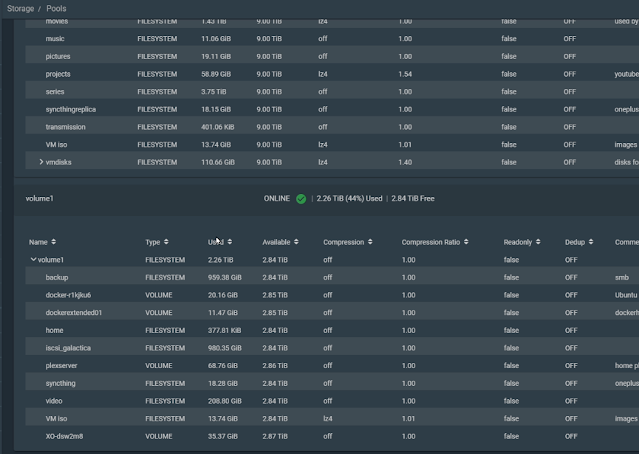
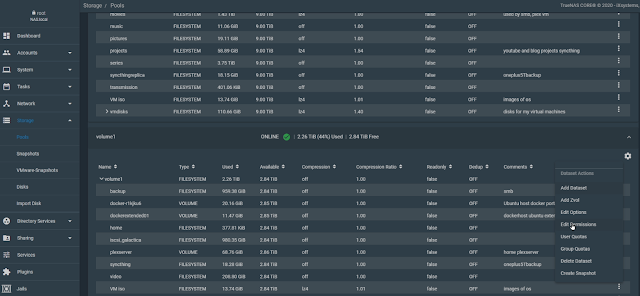
a. when the task is finished go to Storage --> Pools compare the used space if it is the same you are lucky everything is copied to the new Dataset
b. otherwise I use rsync to see if there is a difference between the two Datasets
-r copy all directories and sub directories and files
-v verbose show more information
-n for a dry run nothing will be changed or transferred
rsync -rvn source destination
example # rsync /mnt/volume1/VM\ iso /mnt/RAID5/VM\ iso
If you are happy with the output you can omit the -n and the files will be copied to the other dataset.
4. Put in operation the new dataset.
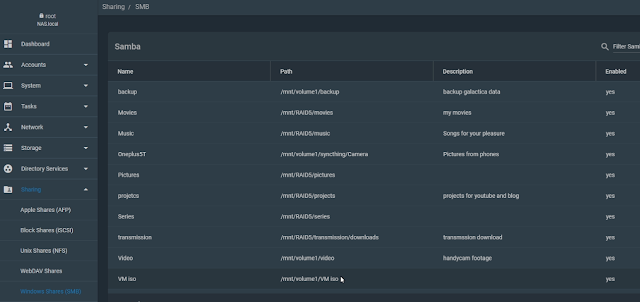
Change everything to point to the new Replicated Dataset in my case it was only one share to change.
a. Select Sharing --> Windows Shares (SMB) and look for the line with the dataset that has to be changed.
b. Select edit and change to the replicated dataset. Followed clicking on the button Save.
5. Delete the old dataset when satisfied.
a. Go to Storage and pools again select Delete Dataset of the old dataset
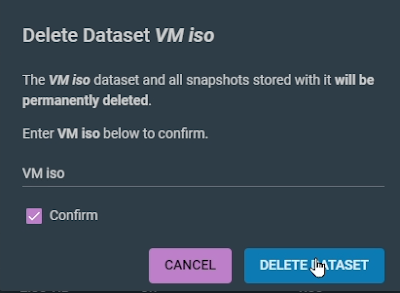
b. Type in VM iso for my example check the box for confirmation and click on DELETE DATASET
Be careful in doing this process try it out with a dummy dataset. Normally I never had a problem with migrating data this way but to be sure keep a backup at hand you never know.






Comments
Post a Comment